Ads 230 x 230

Thursday, November 3, 2011

SSH Web Hosting as Socks5 Proxy for VPN Tunnels via PuTTY

Posted by: , 0 comments

Few know that those who have web hosting are at the same time endowed with a free VPN (Virtual Private Network, a very safe connection to transfer important data). With a few simple steps by the help of PuTTY, the tiny legendary SSH program, anyone with a web hosting account can have a private VPN that’s dedicated, premium and only limited by the monthly bandwidth of your hosting account. This is the safest VPN because it’s not even monitored by the VPN company. It’s completely YOURS.
Before proceeding, you need to make sure your hosting account has SSH enabled. Most hosts offer that nowadays.

What you will get?

You will have an awesome auto-login VPN program on your Windows desktop via SSH tunnels, based on PuTTY. Should get you the same thing on other systems following the same steps outlined below.
Double click to start the program, and a dedicated socks5 proxy will be established on your local computer which connects to your hosting server to form a VPN you can use.
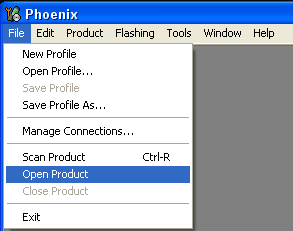
How to get it?

To turn your web hosting account into a private VPN so you can use it to surf the web safely and anonymously, simply follow these steps:
  1. Finish these steps: http://www.shanghaiwebhosting.com/web-hosting/use-your-web-hosting-ssh-session-as-a-tunnel-for-socks5-proxy-server
  2. In step 4 at the above URL, you will save the session and give it a name, e.g. ‘my_server’.
  3. Create a shortcut of this command: C:\tools\putty.exe -load my_server -l your_user_name -pw your_password
Make sure to use your own path to putty.exe rather than “C:\tools\putty.exe”.
The 3rd step is what makes all the difference – manual login or auto-login.
Without the 3rd step, you could still establish the VPN connection but you need to manually enter user name and password every time you start the SSH session. To make things simple, you want PuTTY to auto-login with pre-entered user name and password. That’s where the command line shortcut comes in.
The -load directive loads the saved session, -l specifies the SSH login user name, and -pw specifies the SSH password.

Double click, and that’s it!

Double click the shortcut and an SSH session window will be opened, PuTTY then automatically logs in with the user name and password you provided. If the auto-login is successful, a connection to your hosting server is established, thus VPN created.
Simply leave the session window open and configure your web browser to use ‘localhost’ as socks5 proxy on port ‘8844’ (you can specify a different port in Step 3 of this article), and you will be surfing the web safely and anonymously on a privately premium VPN!
Note that all your browsing traffic is counted on your web hosting’s monthly bandwidth bills. Think twice when you want to perform large downloads (such as 5GBs or larger) because they might end up being a bit costy.

source


flash phones using Phoenix

Posted by: , 0 comments


A. All Steps required before hacking phone :

1. Dowonload Phoenix 2011:,2010
Download here
Then install it.
2. Download the standard FW of Nokia 5800
قم بوضع ملفات الفلاش بأحد الرابطين التاليين :-
C:\Program Files\Nokia\Phoenix\Products\RM-356
C:\Program Files\Common Files\Nokia\DataPackage\Products\RM-356

وجرب ولو ما زبط .. اختار طريقة التفليش بالوضع العادي .. يعني انك ما تعتبر الجهاز ميت لانه انت بتسخدم الطريقة الثانية والطريقة الأولى هي المطلوبة .. بحيث أن برنامج الفونيكس يقرأ الكود الخاص بالجهاز لوحده دون تدخل منك بإختيار

 B. Firmware flash implementation:

بعد تحميل برنامج Phoenix و تثبيته على الكمبيوتر , قم بتوصيل جهازك بالكمبيوتر , بعد التوصيل قم باغلاق اي برنامج له علاقة بالنوكيا مثل OVI suite و PC suite
  و اتبع الخطوات


Note : Must be fully charged before you flash FW

1. Turn off the phone, remove the battery
2. Plug the cable into the phone to connect to PC
3. First open Phoenix ( in  "Run As Administrator" Mode)
4. Click on File , Open Product as shown below


5. Phoenix FW list will appear, click on the cell type filter , and type RM-697 , and then click OK, as shown below
سيظهر لك نوع جهازك كالآتي (اذا ظهرت لك هذه الصورة معناه ان البرنامج قرأ الجهاز):


التاكد اذا كان كود جهازك خاص للشرق الاوسط :

بعض الاجهزة التي تباع في الاسواق و التي ضمانها ليس من وكيل رسمي تكون مستوردة

و يتم تعريبها كاي جهاز و عند تحدث السفتوير تختفي اللغة العربية و السبب ان كود الجهاز ليس عربي من الاساس

لتفادي هذه المشكلة يجب التاكد من التالي :

- ابسط طريقة للتاكد ان جهازك بكود عربي هي القاء نظرة على كتيب دليل المستخدم المرفق في العلبة , اذا كان الكتيب بالعربي فجهازك عربي اذا لم يكون عربي فيوجد حل لهذه المشكلة سيتم شرحها بالفقرة التالية ( فقرة تغيير الكود )

- الطريقة الثانية وهي التاكد من كود الجهاز الموجود خلف البطارية والذي يبدا بالرقمين 05

ملاحظة : فقط تاكد من احدى الطريقتين , الاكواد الموجودة هي المتوفرة حاليا اي انه يوجد اكواد عربية اخرى لنفس الاجهزة لم يتم ذكرها


اذا كان الكود مطابق لاحد الاكواد الموجودة في قائمة الاكواد هنا فهذا يعني ان جهازك عربي اصلي
أو معرفة أكواد اللغات الأخرى من هنــــــا

The Code:

=========

6630


0518108 

0518169

0518192

0518193

=========

N70 Rm84


0524109 

0524110

=========

N73


0529803

0529785 

0540575

=============

6680


0521806 

0521808

0521816

0521817

=============

N80


0527482 

0527483

0526975 

0526976 


=============

N93


0531250

0531251

0531268

0531269

=============

E60


0524674 

0524675


=============

N72


0530848 

0531492 

0530869 

0531493

=============

N73 ME النسخه الموسيقية


0539295

=============

N91


0523203

=============

N70 ME النسخة الموسيقيه


0539237 

0539240

=============

N80 ei النسخة المخصصة للانترنت


0539672 

0542489

0542487 

0542488

=============

6630 ME النسخة الموسيقيه


0527824 

0527825 

0529315

=============

3250 Xpress Music 


0539322

=============

E50


0536258 

0536259 

=============

7370


0527728

0527732

=============

E70


0527023 


=============

6270


0530820 

0530822

=============

6233


0532314


=============

E50 بدون كاميره


0536216 


=============

E61


0530096


=============

N71


0526153


=============

N90


0523891


=============

N91 8GB


0539392


=============

E65 


0515309

0515311

0542347

0542348


=============

n95


0536078

0534856

=============

7390


0534726

=============

6300


0538331

============

N76


0543089

0543085

0543086 

0543088


==========

6110 Navigator


0546017

0546756 

0552728 


============


E61i


0541677


=============


6131


0532325


=======


Nokia 5700 XpressMusic


0515740


=======


E90 Communicators


0545999

0544406


======

N95 8GB


0553640

0557663


======

N81 8GB


0545895


======

N81


0550189


========

E51


0552344

0554367


======

E51 بدون كاميرا


0560512


=======

n82


0551528 

0551527


=====

5310


0547368


====

6120


0547931 

0547708


=====

N93i


0540906


====

Nokia 6500 Slide


0549722 

0553202 


======

5300


0540649 

0540652 

0540660 

0540662


===

n73 Ramadan 


0555266


======

N77


0545005


======

N92


0536651


====


6500 classic


0548857 

0551661 

0548845 

0548844 

0551647 

0551648 


=======

8800 Arte


0552145


======

N78


0555804


====

N96


0554269


====

N85


0561234

0569602

0575030


====

N79


0568359


====

E66


0557965

0558481

0558484

0575565


====

E71


0566976


====

5800XM


0559408

0559416

0574329 


======

X6-16GB


0589452


ملاحظة : الي تاكد ان جهازه عربي باحدى الطريقتين ينتقل لفقرة ( طريقة التحديث ) مباشرة


عليك معرفة الـProduct code الخاص بجهازك حتى يتم اختيار اللغة العربية لجوالك , اتبع الصور لمعرفة هذا الكود


6. Click on Tab Flashing , select Firmware Update , as shown below


7. Click the box as shown below to select FW


8. Select as shown below, Then Click OK


9. Then click Options , delete the two files that have been zoned as shown in Figure (step 1)


10. Then select Add as shown above, it will pop up dialog box, select the Hack file which you have extracted on the Desktop or Anywhere else, then choose the parameters as shown in the figure below, then select OK


11. At the Advanced Options dialog box of DP2.0 Firmware Update, click OK, as shown below


12. At Firmware Update dialog box, choose Phoenix refurbish a dialog box will appear
At this time you click OK in the dialog box, insert the battery and hit "switch on button" for second, as shown below


After completing the process browse to C:hack from phone and install RomPatcherPlus.sis and apply the patches.And your phone will be totally hacked.


Slideshow

 
صفحات مبعــثرة كسرت حاجز الصمـت لتحكي
متعة الحياة أن تعمل عملا لم يسبقك إليه أحد ولم يتوقعه الآخرون.................. Its just another way to unlock ur potential representing my internists with other. By sniffing the web u might see several info.,instructions and details. here i collect similar and simplify them to u, cutting out from my time, efforts even i create my unique posts